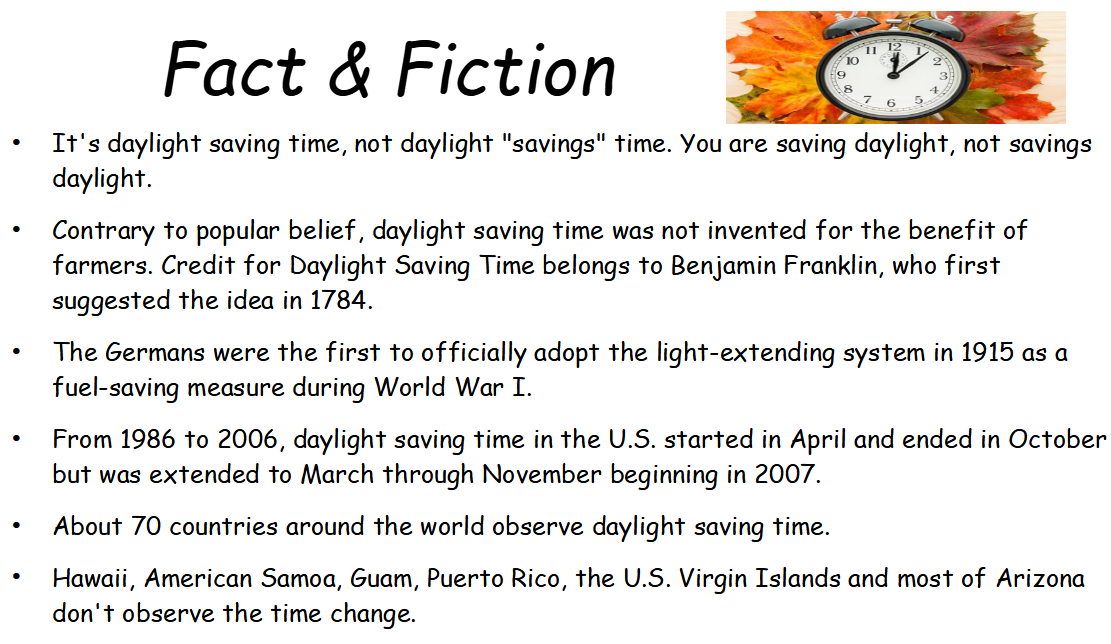
Friday, January 20, 2023

New Year ... New You?


New Year … New You?
Where did all these cars come from?” I asked myself as I drove through the local shopping center parking lot. Then I remembered what month it was - January. The largest tenant of the shopping center is a gym which was full of people working on their New Year’s Resolutions. How many people will continue exercising at the gym consistently, for the rest of their lives?

The same thing happens in yoga studios during January, they are packed. In fact, that is how my yoga practice began over a decade ago - in January - in a packed yoga studio. At the end of my first class, I asked the woman next to me, “Is it always this crowded?”

Don’t worry, half of these people will disappear by Valentine’s Day.” she answered.

Maybe they will do yoga at home.” I said.

I doubt it,” she responded. “They’ll probably just quit.”

Is it possible, regardless of your age, to begin practicing yoga as a New Year’s Resolution and then develop a lifelong practice? Yes, it all depends on how you approach yoga.

The Approach

Many young people approach yoga as a “workout.” That is okay but it isn’t the only approach to yoga, nor is it the best one for the 50+ crowd. For people aged 50 and older, a realistic approach is more appropriate. Talking with your doctor before you begin a yoga practice is the first step in approaching your practice realistically.

You may need to reconsider some yoga poses if you have a chronic condition that makes a particular pose inaccessible to you. I have high blood pressure which precludes me from doing headstands. Or you may have an old or new injury that needs to be considered. My broken wrist healed but no longer bends to accommodate arm balances, Chaturanga or any pose that requires my wrist to bend 90 degrees. Rather than giving up yoga, I approach it with my reality and accommodate by substituting, adapting, or avoiding poses.

Do NOT approach yoga as a competition! Some older people compete to see if they can do whatever the “young” people are doing with no thought of what is appropriate for their body. You can attempt poses but you must be able to tell the difference between movement that causes pain and possibly injury (OUCH!) and movement that is challenging (Ohh, that feels spicy!). 

The best approach to yoga, for all ages, is one that focuses on moving your body in a way that fosters compassion and connection with the changes that are occurring over time in your body. This means you may change from one style of yoga to another to over time. New poses may come while others go. Regardless of the poses or style, approaching your practice with steadiness and comfort is key to a lifelong practice.

Steadiness and Comfort

The Yoga Sutras are a collection of texts written by the sage, Patanjali, around 400 C.E. The collection contains what is thought to be much of the basis of classical yoga philosophy and is made up of 196 sutras (aphorisms or sayings) which offer guidelines for living a meaningful and purposeful life. It doesn’t have much to say about yoga poses. Only 3 of the sutras (2.46 – 2.48) explain asana, the physical aspect of yoga.

Sutra 2.46 tells us simply that yoga poses should be steady and comfortable. Knowing that this is the only instruction for yoga poses frees us from feeling like our yoga practice has to look a certain way. You can do a headstand, or not; an arm balance, or not: a balance pose, or not.

Your practice is your practice. Whether you are standing, seated on a mat, or in a chair, find steadiness and comfort in your poses.   Do what works for you and the current state of your body. Seize the opportunity to foster a better connection with the changes that are occurring over time in your body. With this approach you will be a "new you" everyday - for the rest of your life.

Friday, November 4, 2022

Fall Back!

On Sunday, November 6, 2022, at 2:00 a.m. (local time) clocks will be turned back one hour. Daylight saving time is ending … until March 2023.
We spring forward one hour in March and fall back one hour in November. Research suggests that even a one-hour change of the clock may impact health significantly, including strokes, heart attacks, accidents and changes in mood. Why? The answer is your circadian rhythm also known as your biological clock. 
Scientists believe ill health effects from time changes result from a mismatch between daylight saving time and our 24-hour biological clock. Ticking away at the molecular level, the biological clock is set by exposure to sunlight and darkness. Our biological clock regulates bodily functions such as metabolism, blood pressure and hormones that promote sleep and alertness. Time changes disturb our natural rhythms - messing with our sleep schedules and biological clock.
If you have ever experienced jet lag you are probably familiar with the symptoms of disturbed rhythms which include drowsiness; a tendency to fall asleep during the day; and an inability to fall asleep at night. Other symptoms include an inability to concentrate and think clearly, as well as disturbances in digestion and elimination. 

Many people find “falling back” easier than “springing forward.” In fact, numerous studies have linked the start of daylight saving time in the spring with a brief spike in car accidents, and with poor performance on tests of alertness, both likely due to sleep loss. However, many people still feel groggy after that extra hour of sleep in the fall.

3 Restorative Poses to Help You “Fall Back

These poses are designed to relieve symptoms of disturbed natural rhythms and help you adapt to the time change more quickly.

Gather your props: 1 -3 blankets, a yoga bolster or pillows, wall space, and a timer (phone). Optional: chair.
 
1. Simple Supported Backbend (2-5 minutes)
Simple Supported Backbend
This pose improves breathing, reduces fatigue, and counters the effects of sitting, hunched forward for long periods.

You will need a bolster, pillow or two folded blankets to support your back and one folded blanket to support your neck.

Sit on the floor in front of the long side of your bolster (or pillows), knees bent, feet resting on the floor;

Move slowly – if lying back causes you discomfort, begin by lying on your side over the bolster (pillows) and then turning onto your back;

Place one hand under your neck for support and release it down onto a rolled blanket;

Lie over the bolster/pillows/blankets so that your middle back is supported and your shoulders rest comfortably on the floor. (2-5 minutes)

If your lower back feels uncomfortable, lift your hips and scoot your tailbone towards your feet, release your hips to the floor.
 
Coming out of the pose: Remove the blanket from under your neck and, on an exhale, push with your feet and slide toward your head. Rest for a few breaths with your lower back flat on the floor and your legs supported by the bolster. Roll to one side and, on an inhale, use your arms to gently press up into a sitting position. 

*Do not practice Simple Supported Backbend ...

if you experience sharp pain (vs. a stretching sensation) in your lower back; have spondylolisthesis, spondylolysis, or diagnosed disc disease; are more than 3 months pregnant; or during menstruation.

2. Knees Down Twist on the Wall (1-3 minutes per side):
Knees Down Twist on the Wall

Indian yoga master B.K.S. Iyengar describes twists as a "squeeze-and-soak" action: The organs are compressed during a twist, pushing out blood filled with metabolic by-products and toxins. When we release the twist, fresh blood flows in, carrying oxygen and the building blocks for tissue healing.

So breathe easily here, knowing that you are stimulating your natural healing process.

You will need a folded blanket(s) to place between your knees, one blanket to support your neck and a timer (phone).

Come down onto your back;

knees bent with feet flat on wall;

place folded blanket(s) between legs;

on an exhale, gently “walk” the feet down the wall to the right;

rest stacked knees on the floor and soles of the feet on wall (1-3 minutes).

Before switching to the left, “walk” the feet up the wall to the center and take 3 calm breaths.

Repeat to the left (1-3 minutes). 
 
Coming out of the pose: On an inhale, “walk” your feet up the wall to center. On an exhale, roll to your right side and remove the blankets from between your legs. On an inhale, use your arms to slowly press up into a seated position. Take 3 slow, calm breaths.
 
*Do not practice Knees Down Twist on the Wall ...
if you have a hiatal hernia or heart problems; are more than 3 months pregnant; or are menstruating.
 
3. Supported Fan Pose (2-5 minutes, switch cheeks halfway through):
Supported Fan Pose
This is a relaxing forward bend that opens up your inner thighs and gently stretches the lower back.  There are many options for this pose, choose the one that works best for you!

You will need a bolster or several folded blankets and a timer (phone). Optional for variation: a chair.

Sit on the floor:

open your legs into a comfortable “fan” position, you may want to place a folded blanket under your hips;

place your bolster or pillow(s) lengthwise on the floor in front of you, between your legs;

on an exhale, release forward, resting your torso and head on the bolster/pillow(s);

if you feel any strain, increase the height of the bolster with folded blankets so that you are releasing down rather than stretching and straining towards the bolster ;

rest your forehead on the bolster or turn your head to one side and rest your cheek on it;

rest your arms on each side of the bolster or drape them over the bolster;

close your eyes and breathe normally, let your body be supported by the props (2-5 minutes, switch cheeks halfway through).

OPTIONAL CHAIR VARIATIONS:

Lean forward and rest your folded arms and forehead on the chair seat. Add folded blankets to the chair seat until your are comfortable. Add a folded blanket under your hips for added comfort.  If this is too stressful, turn the chair around and rest your folded arms against its back. 
Supported Fan Pose with Chair Seat
Supported Fan Pose with Chair Back
Leg options include: open in “fan” - like above;
OR: cross-legged (change the cross of the legs halfway through the pose); and one leg straight in front under the chair, and one knee bent, with the foot folded towards your pelvis - like below.
 
Supported Fan Pose with Chair and Crossed Legs
Supported Fan Pose with Chair and Leg Under
Coming out of the pose: Place your hands on the bolster or chair, inhale, and using your arms, press slowly up into a seated position. Exhale. Inhale, exhale and place your hands behind you and lean back to relieve your back. Take 3 slow, calm breaths.

Do not practice Supported Fan Pose ...

if you have sacroiliac pain. This is most often experienced as a circle of pain about the size of a quarter over the left or right side of the sacrum. Seek the advice of your health care provider regarding your sacroiliac alignment.

BONUS POSE: My favorite anytime pose … Legs Up the Wall
Legs Up the Wall Pose
The restorative nature of this pose gets blood flowing to parts of the body that need it, making it good for most any ailment including disturbed natural rhythms. The accumulated fluid in your legs flows down, toward the main lymphatic duct in your abdomen. Fluids are shifted from your legs and feet, releasing lactic acid, which relieves tired muscles and gently stretches the back of the legs. 
 
You will need a blanket(s), wall space and a timer (phone). Optional for variation: a chair.
 
Legs Up the Wall: (7-10 minutes):

Have a blanket handy to place under your neck and head;

sit with one shoulder near the wall and your thighs parallel to the wall;

roll back as you swing your legs up the wall;

once you are in position, make sure your tailbone and buttocks are not lifted off the floor – if so, move your hips away from the wall;

place a blanket or pillow under your neck and head if needed for comfort;

your arms can be in any position that is comfortable for you (7-10 minutes).
 
Variation with Chair: 

Coming out of the pose: Bend your knees towards your chest. On an exhale, roll to one side. Pause for a breath, then use your arms to press up into a seated position. Take 3 slow, calm breaths.

Do not practice Legs Up the Wall ...
if you have a hiatal hernia; are menstruating; are more than 3 months pregnant or at risk of miscarriage; or you have sciatica.
 
As you "fall back" this year, remember to breathe ...
 
Breathing in, you touch the fact that you are alive, that you are in rhythm with the flow of life. 
Breathing out, you know that life is a miracle, that you are living that miracle … here and now.


Monday, July 25, 2022

Omm ... Ouch!


Many people believe yoga is a source only of healing and never harm. Glenn Black, a yoga teacher for 40 years, has a cautionary tale: “In India, a yogi came to study at Iyengar’s school and threw himself into a spinal twist. I watched in disbelief as three of the man’s ribs gave way – pop, pop, pop.” He goes on to say, “Never do headstand, shoulder stand, or plow.”

Black should know, he had spinal fusion and has screws in his lower lumbar spine to stabilize herniated discs and spondylolisthesis. How did his injuries come about? Black explains, Yoga. Extreme back bends, and twisting coming up from my hands on my ankles. I overstretched my ligaments and destabilized my spine.”


You may want to think twice about these “impressive” yoga poses … and some of their associated injuries!

Thoracic outlet syndrome – compression of nerves passing from the neck into the arms

Degenerative arthritis of the cervical spine

Retinal tears – increased eye pressure causes the delicate retinal tissue to pull away from the back lining of the eye.

Cobra Pose

Cerebral damage – hyper-flexion of the neck wounds the vertebral arteries, producing clots, swelling and constriction
Wheel Pose

Horner’s syndrome – disruption of a nerve pathway from the brain to the head and neck which causes constricted pupil, drooping of the upper eyelid, absence of sweating of the face, and sinking of the eyeball into the bony cavity that protects the eye.

Hero Pose

Yoga foot drop” – nerves are deprived of oxygen below the knee causing difficulties walking and climbing stairs, foot drags while walking

Hand-to-Big-Toe Pose
Strains, sprains, and dislocations – overstretching that causes muscle damage and torn cartilage. 
 

Injuries happen to yoga teachers, too. Some teachers have practiced downward-facing dog so strenuously that they have torn their Achilles tendon. Many yoga teachers have had to have hip replacement surgery and “bad backs” are also common.

Yikes! Black goes on to say, “The vast majority of people should give up ‘yoga’ altogether. It’s simply too likely to cause harm.”

Don’t give up, yet! In yoga, like running, the vast majority of injuries are caused by “overdoing” it. Many people simply rush through a series of postures just to say they’ve done them – similar to runners adding “junk” miles just to add X number of miles to their training logs. Also, many people push themselves past stabbing pain in a yoga pose because they don’t want to be seen as weak, or inflexible - similar to runners tying to run through pain so they won’t seen as a “wimp.” Many people become frustrated with their bodies for “not keeping up” with their expectations so they overdo it to the point of injury.

Most people have underlying physical weaknesses or problems that make injury all but inevitable. Instead of practicing yoga poses for a specific range of motion that makes sense for their body, they attempt to force their bodies to do what the teacher’s or classmates’ bodies are doing.

You need to be aware of YOUR body and not push past your God-given limitations!

Black explains, “Most people have a limited view of yoga and approach it as a physical discipline, … Awareness and consciousness are no longer emphasized, and yoga somehow became relegated to physical exercise. It is a myth that it's safe to do asana without awareness and consciousness.”

Five Ways to Avoid Yoga Injuries ...

1. Be willing to get in touch with your body and accept its limits.

2. Move with care, listen to your pain signals. Sharp, stabbing pain? Stop! Be willing to adapt poses, use props or skip poses.

3. Be in the present moment; focus on what you can do now, not what you used to do, or what you think you should be doing a month from now. Your practice will change over the years – that’s normal, that’s natural.

4. Have goals, but be realistic and honor your body. Don’t expect to do too much too soon when learning a new pose. Pushing your body to new extremes will undoubtedly cause injury.

5. Balance yoga with the rest of your lifestyle. If you are already performing high-intensity activities such as running, swimming, cycling, etc., choose a gentle or restorative practice to avoid injuries. If you are basically sedentary, begin with chair, restorative or gentle practices and then, over time, move into a more active hatha or vinyasa practice.

References:

Broad, W. J. (2013). The Science of Yoga: The Risks and Rewards. Simon & Schuster.

Burkhardt, Laura. 10 Ways to Get Real About Your Body’s Limitations & Avoid Yoga Injuries. Yoga Journal. January 10, 2018

Cramer H, Quinker D, Schumann D, Wardle J, Dobos G, Lauche R. Adverse effects of yoga: a national cross-sectional survey. BMC Complement Altern Med. 2019 Jul 29;19(1):190. doi: 10.1186/s12906-019-2612-7. PMID: 31357980; PMCID: PMC6664709.

Fromberg, Eden. Glenn Black Responds to New York Times Article on Yoga. Huffpost. January 12, 2012.

McCrary, Meagan. Inside My Injury: A Yoga Teacher’s Journey from Pain to Depression to Healing. Yoga Journal. May 7, 2018.

Sfeir JG, Drake MT, Sonawane VJ, Sinaki M. Vertebral compression fractures associated with yoga: a case series. Eur J Phys Rehabil Med 2018;54:947-51. DOI: 10.23736/S1973-9087.18.05034-7

Swain TA, McGwin G. Yoga-Related Injuries in the United States From 2001 to 2014. Orthopaedic Journal of Sports Medicine. November 2016. doi:10.1177/2325967116671703

Monday, March 7, 2022

Spring Forward!

Twice a year, we experience daylight saving time by springing forward in March and falling back in November. Research has found this changing of clocks impacts people differently based on their tendency to be either an “early bird” or a “night owl.”

In the study, researchers assessed changes in participants’ sleep schedules the week before, during, and after “springing forward” in March 2019. They found that people whose genes make them more likely to be early birds adapt to the time change in a few days, while night owls could take more than a week to return to their normal sleep schedule.

Congress also acknowledges the impact of “springing forward” and “falling back.” They are considering The Sunshine Protection Act of 2021 (H.R. 69), which would make daylight saving time the new, permanent standard time. It was introduced into Congress on January 4, 2021 and was referred to the House Subcommittee on Consumer Protection and Commerce. Once out of committee, the bill will possibly be sent on to the House or Senate. In other words, until Congress passes this bill, early birds and night owls must learn to deal with the time change.

Can Restorative Yoga Help Early Birds? Night Owls?

Adjusting to time changes and different time zones often disturbs our natural (circadian) body rhythms. If you have ever experienced jet lag you are probably familiar with the symptoms of disturbed rhythms which include drowsiness; a tendency to fall asleep during the day; and an inability to fall asleep at night. Other symptoms include an inability to concentrate and think clearly, as well as disturbances in digestion and elimination.

Recovery from disturbed rhythms is tied to your individual physiology. Simply put, some people adapt more quickly to the new time but both early birds and night owls may benefit from restorative yoga.
soulveda.com

3 Restorative Poses to Help You “Spring Forward”

As you calm your body with these 3 simple poses, bring your awareness to your breath. When you bring your awareness to your breath, you realize you are living, present here and now – regardless of daylight savings time.

6-3 days before the time change & on Saturday evening: When "springing forward", a 10 p.m. bedtime is really an 11 p.m. bedtime, prior to the switch. So, to help your body adjust to this change, practice these poses two hours before your preferred bedtime. So if you normally go to bed at 10 p.m., practice these poses at 8 p.m.

6-3 days after the time change: Practice the poses one hour before your bedtime (9 p.m. for a 10 p.m. bedtime).

You will need: 1 or 2 blankets, yoga bolster or pillows, wall space, and a timer (phone). 
 
1. Knees Down Twist on the Wall
 
Knees Down Twist on the Wall
Indian yoga master B.K.S. Iyengar describes twists as a "squeeze-and-soak" action: The organs are compressed during a twist, pushing out blood filled with metabolic by-products and toxins. When we release the twist, fresh blood flows in, carrying oxygen and the building blocks for tissue healing.
So breathe easily here, knowing that you are stimulating your natural healing process.

1. Knees Down Twist on the Wall (1-3 minutes per side):

Come down onto your back;

knees bent with feet flat on wall;

place folded blanket(s) between legs;

on an exhale, gently “walk” the feet down the wall to the right;

rest stacked knees on the floor and soles of the feet on wall.

Before switching to the left, “walk” the feet up the wall to the center and take 3 calm breaths.

Repeat to the left.

*Do not practice this pose

if you have a hiatal hernia or heart problems; are more than 3 months pregnant; or are menstruating.

Coming out of the pose: On an inhale, “walk” your feet up the wall to center. On an exhale, roll to your right side and remove the blankets from between your legs. On an inhale, use your arms to slowly press up into a seated position. Take 3 slow, calm breaths. 
 
2. Child's Pose 
Child's Pose

This pose brings awareness to the breathing in the back of your body. 60 percent of our lungs are in the back and only 40 percent in the front, so don’t neglect moving your breath into your back. Spread your back ribs to the sides as you inhale ... then ride the exhalation back to neutral on the exhale.

2. Child’s Pose (5-8 minutes, switch cheeks halfway through):

place your bolster or pillow(s) on the floor in front of you;

kneel with your knees hip-width apart;

sit back on your heels;

place a blanket(s) under your knees/shins/ankles if needed for comfort;

separate your knees wide enough to place the bolster/pillow(s) between your thighs;

on an exhale, release forward, resting your torso on the bolster/pillow(s);

rest on your left cheek, turn to your right cheek halfway through

*Do not practice this pose

if you have a chronic back condition or are more than 3 months pregnant.

Coming out of the pose: Place your hands on the floor under your shoulders, inhale, and press slowly up onto your heels. Exhale. Inhale, exhale and untangle your legs and come to a seated position. Take 3 slow, calm breaths.
 
3. Legs Up the Wall
 
Legs Up the Wall

While in this pose take several long, slow breaths. As you do, imagine the accumulated fluid in your legs flowing down, toward the main lymphatic duct in your abdomen. Fluids are shifted from your legs and feet, releasing lactic acid, which relieves tired muscles and gently stretches the back of the legs. Feel your entire spine supported by the floor. Welcome the opportunity to be still.

3. Legs Up the Wall: (7 – 10 minutes):

Have a blanket handy to place under your neck and head;

sit with one shoulder near the wall and your thighs parallel to the wall;

roll back as you swing your legs up the wall;

once you are in position, make sure your tailbone and buttocks are not lifted off the floor – if so, move your hips away from the wall;

place a blanket under your neck and head if needed for comfort;

your arms can be in any position that is comfortable for you.

Do not practice this pose

if you have a hiatal hernia; are menstruating; are more than 3 months pregnant or at risk of miscarriage; or you have sciatica.

Coming out of the pose: Bend your knees towards your chest. On an exhale, roll to one side. Pause for a breath, then use your arms to press up into a seated position. Take 3 slow, calm breaths.

Breathing in, you touch the fact that you are alive, that you are in rhythm with the flow of life. 

Breathing out, you know that life is a miracle, that you are living that miracle … here and now.